Though Twitch and YouTube reign supreme in the live streaming market, Smashcast (the esports-streaming platform which consolidated features from Hitbox and Azubu) retains its loyal niche following in 2025. With its low-latency streaming, esports-centric focus, and interactive options, Smashcast remains a reliable option for competitive gamers and esports teams.
If you’re asking yourself: “How do I begin streaming on Smashcast in 2025? What settings should I use for optimal quality?” — this tutorial by GreatOverlays will guide you step by step. You’ll discover how to:
- Setup your Smashcast channel and stream key.
- Configure OBS Studio for optimal-quality Smashcast streams.
- Utilize professional overlays and alerts by GreatOverlays.
- Stream-optimise for esports, casual gaming, or creative content.
Step 1: Creating Your Smashcast Channel

Before you can go live, you’ll want to set up your Smashcast account correctly:
- Sign Up or Log In → Go to Smashcast.tv and sign up for an account.
- Access Creator Dashboard → Go to the Live Dashboard.
- Set Up Channel Info → Fill in your stream title, game category, and description.
- Get Your Stream Key → Under Broadcast Settings, copy your own RTMP stream key.
- You’ll need this to connect OBS Studio to Smashcast.
Pro Tip: Secure your stream key — never share it publicly. If it’s leaked, reset it immediately.
Step 2: Setting Up OBS Studio for Smashcast
OBS Studio is one of the most popular streaming tools, and it works perfectly with Smashcast.
- Download & Install OBS Studio → obsproject.com
- Open OBS Settings → Stream Tab
- Service → Select Custom (Smashcast doesn’t always appear as a default)
- Server → Paste the RTMP server URL from your Smashcast dashboard
- Stream Key → Paste the copied key
- Click Apply & OK
Your OBS Studio is now connected with Smashcast.
Step 3: Best OBS Studio Settings for Smashcast (2025)
To achieve the best video/audio quality without lag:
Video Settings
- Base Resolution: 1920×1080 (or your monitor’s resolution)
- Output Resolution: 1920×1080 (high-end PCs) or 1280×720 (mid/low-end)
- FPS: 60 for esports/high-speed games; 30 for general streams
Encoder Settings
- Encoder: NVENC (if having NVIDIA GPU) or x264
- Bitrate: 6000 kbps for 1080p60, 4500 kbps for 720p60
- Keyframe Interval: 2 seconds
Audio Settings
- Sample Rate: 48kHz
- Bitrate: 160 kbps for sharp voice + game audio
Step 4: Adding Professional Overlays & Alerts (GreatOverlays)
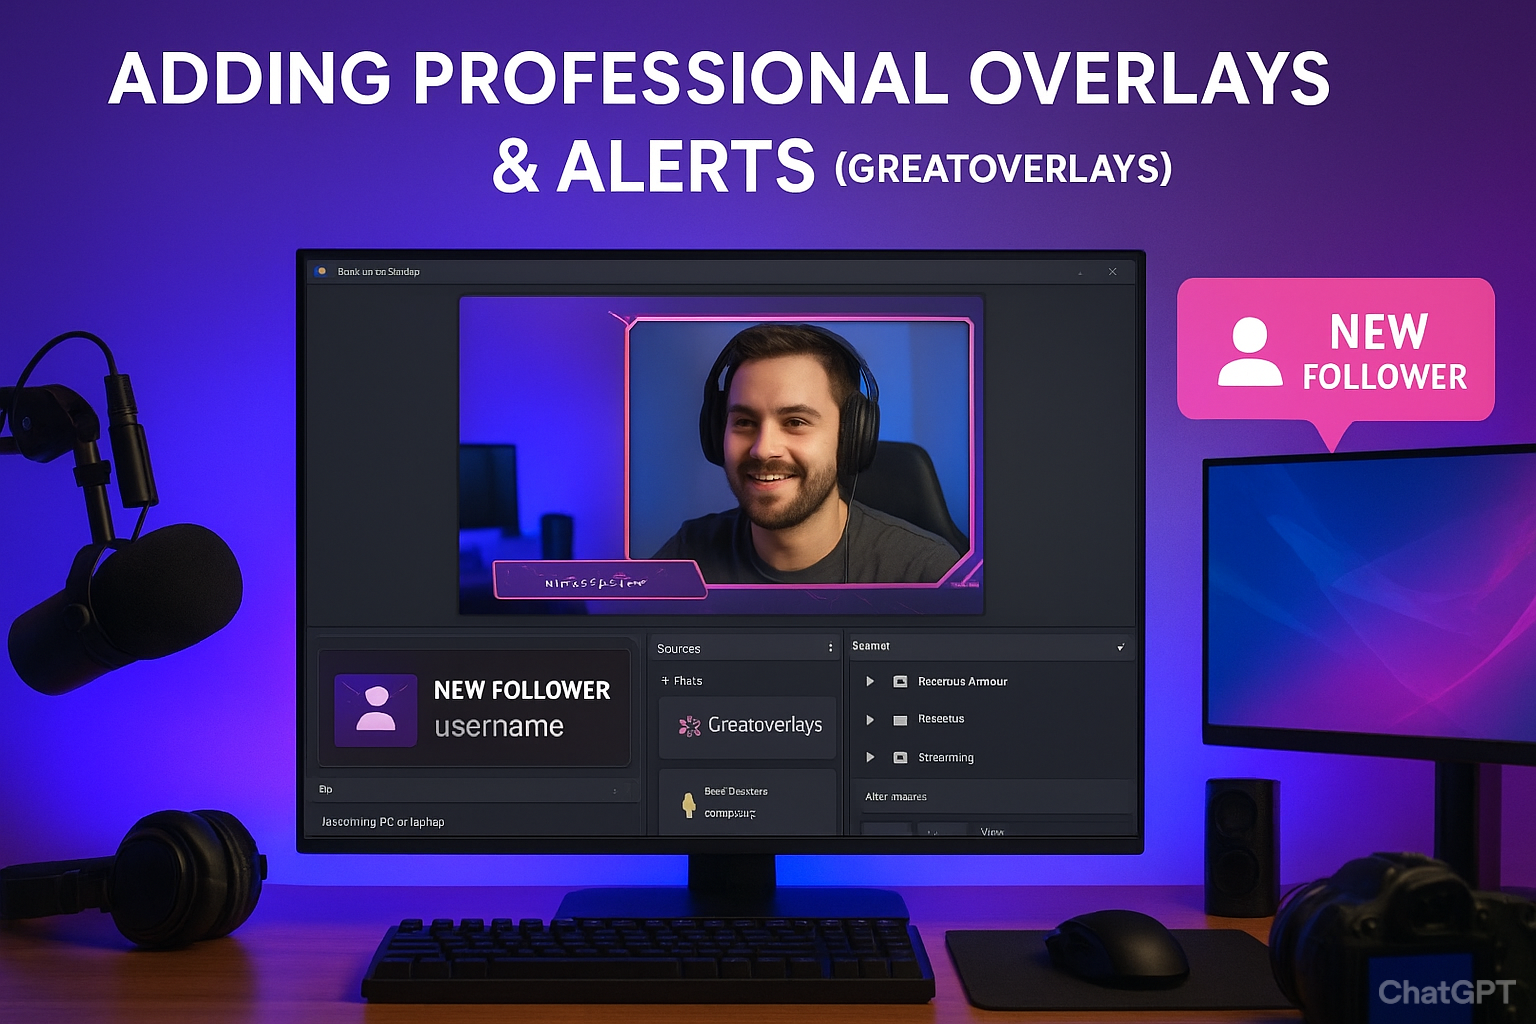
A stream without overlays is dull. Make your Smashcast channel appear professional by adding animated overlays, alerts, and labels from GreatOverlays:
- Overlay Packs: Animated webcam frames, banners, and transitions
- Alerts: Notifications for new followers, subscribers, or donations
- Labels: Show “Recent Follower” or “Top Donor” in real-time
- Scene Setup: Start screen, intermission screen, and end screen designs
Import overlays in OBS:
- Navigate to OBS → Sources → Add → Browser Source
- Paste the URL from your GreatOverlays package
- Adjust dimensions & position to match your layout
Now your Smashcast stream is clean, branded, and interactive.
Step 5: Live Streaming on Smashcast
- Launch OBS Studio → Click Start Streaming
- Your stream goes live automatically on Smashcast
- Keep an eye on your stream via the Smashcast Live Dashboard
For esports streams, keep in mind:
- Stable internet (at least 10 Mbps upload speed)
- Wired Ethernet over Wi-Fi
- Test stream prior to tournaments to prevent problems
Step 6: Pro Tips to Grow on Smashcast in 2025
Streaming on Smashcast involves a slightly different approach than Twitch or YouTube:
- Esports Content Focus: Smashcast does extremely well with esports tournaments and matches
- Cross-Promote: Pin your Smashcast link on Twitter (X), Discord, and Reddit forums
- Consistency is Key: Stream at regular times so fans know when to watch
- Engage Viewers: Utilize chat as it happens, hold polls, and thank followers
- Upgrade with GreatOverlays: Professional appearance builds confidence and facilitates sponsorships
FAQs – Smashcast Streaming Guide 2025 (GreatOverlays Edition)
Q1: Do I require a capture card to stream Smashcast from Xbox/PS5?
A: Yes, for optimum quality. Capture cards such as Elgato HD60X are preferred. Direct streaming apps can suffice for casual usage.
Q2: Can I stream at 4K on Smashcast?
A: Yes, Smashcast has 4K streaming support, but you’ll require a powerful PC, GPU, and 20 Mbps or more upload speed.
Q3: Is Twitch or Smashcast better for esports?
A: Twitch has a larger following, but Smashcast provides low latency and esports-centric features, which make it favorite among competitive gamers.
Q4: What overlays can I use for Smashcast?
A: Use GreatOverlays animated packages — starting, intermission, and ending screens with alerts and labels to enhance professionalism.
Q5: How do I resolve lag on Smashcast streams?
A: Reduce the OBS output resolution, decrease bitrate, and use wired internet at all times rather than Wi-Fi.