Stream Elements Widgets Tutorial

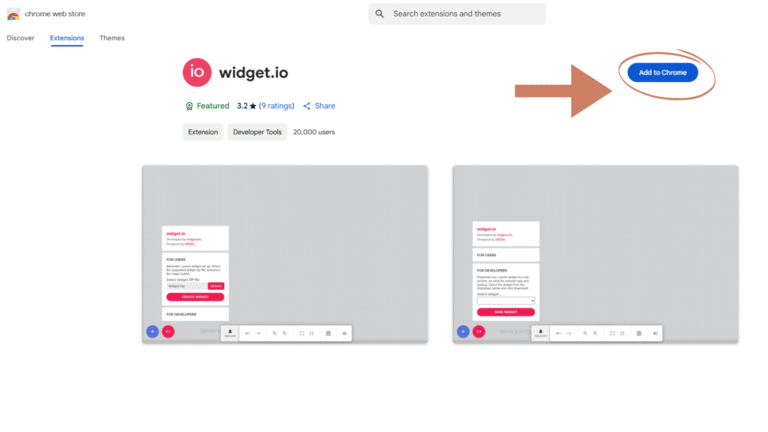
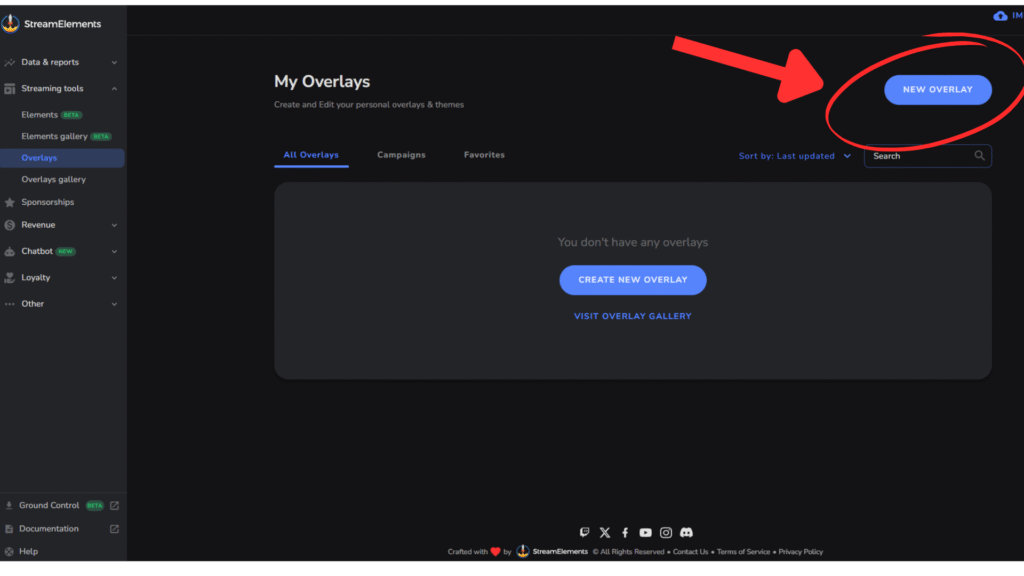
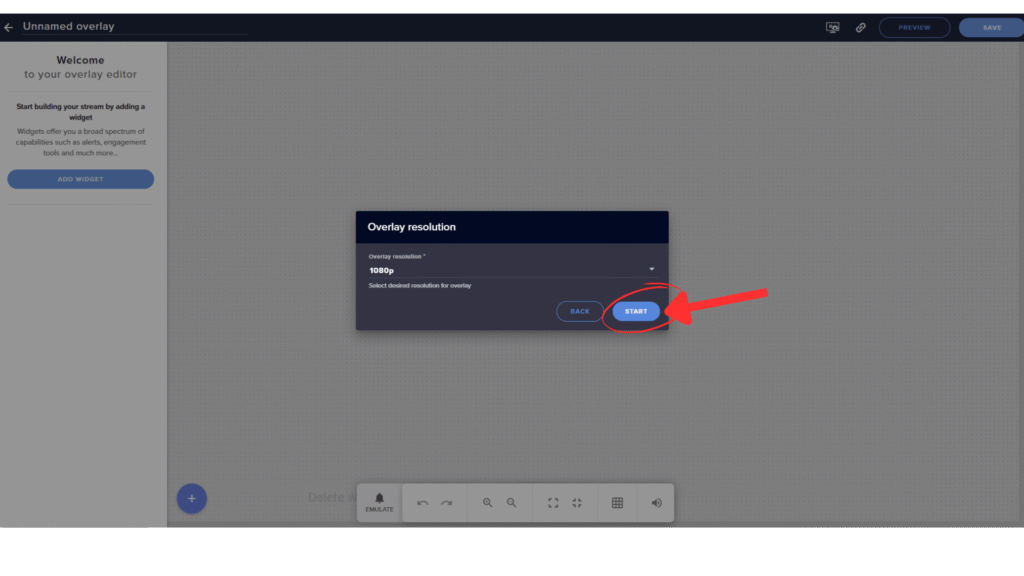
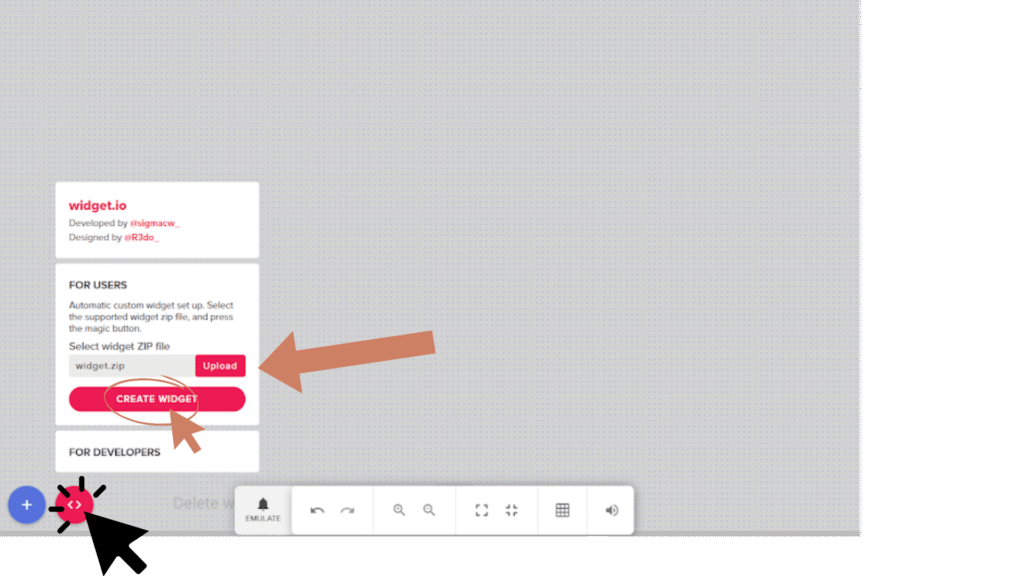
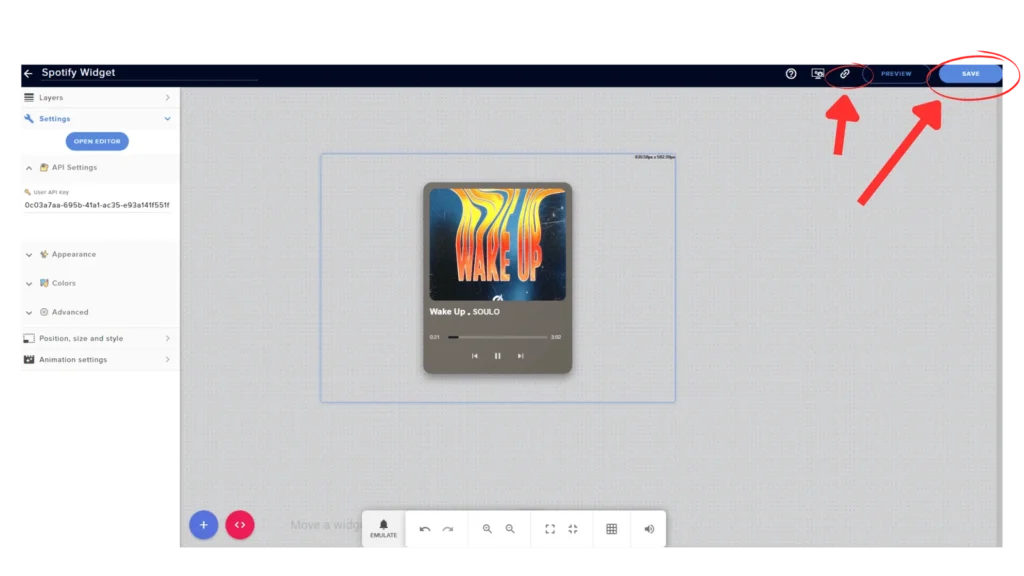
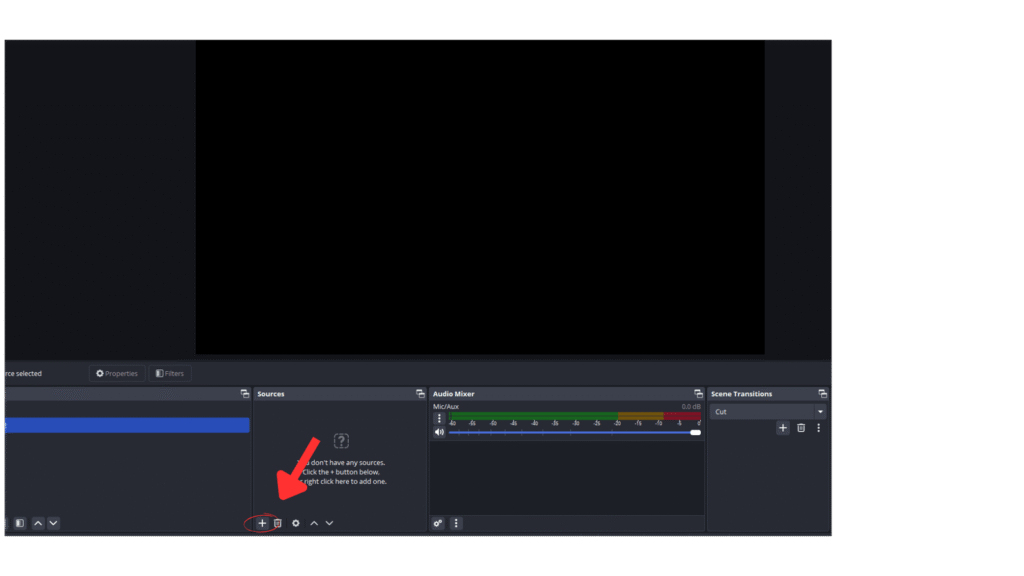
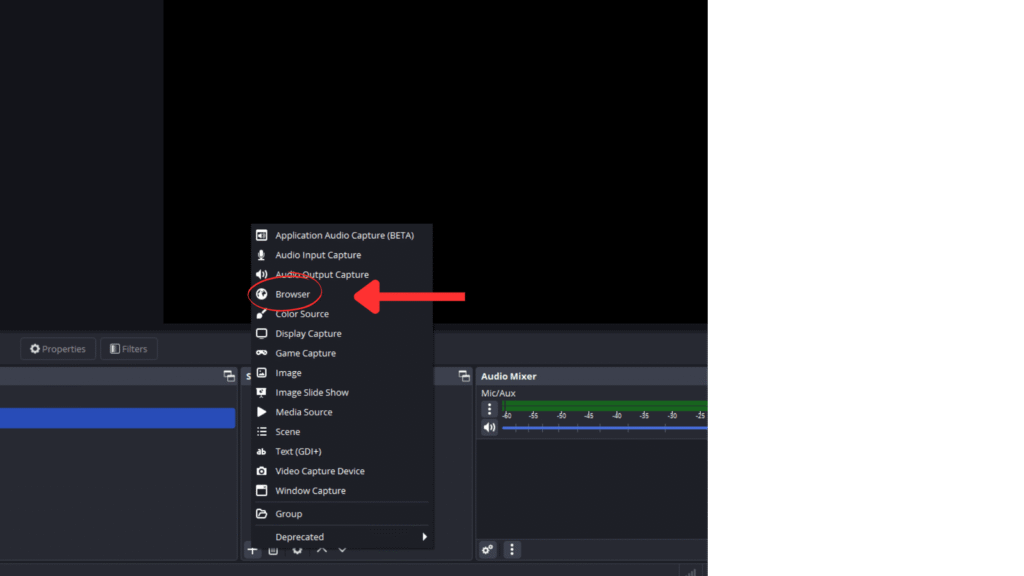
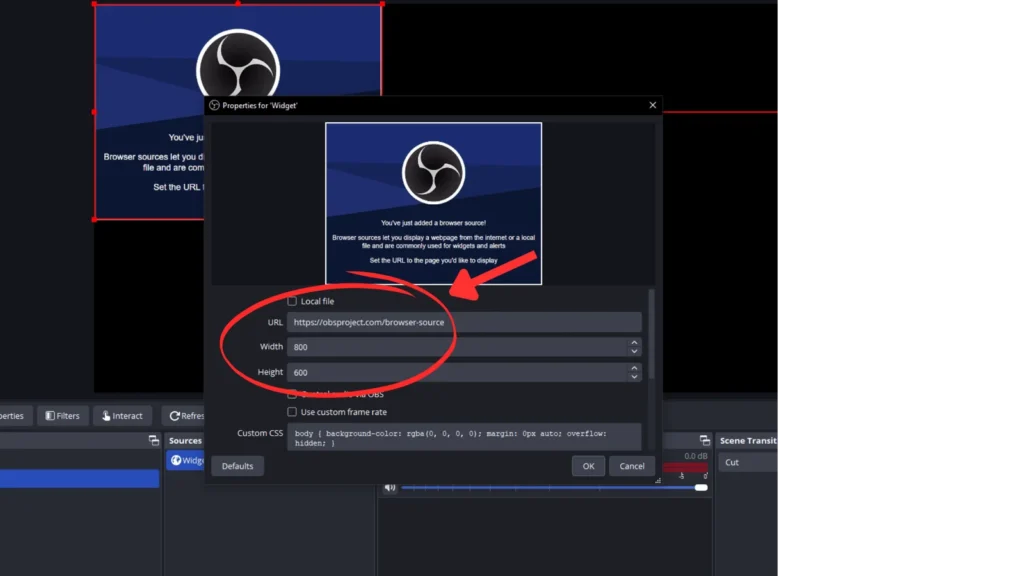
This guide walks through the process of loading widgets in StreamElements and OBS Studio, ensuring a smooth and professional-looking stream.If you want to watch the tutorial, click here.

Step One:

  1. Download the WIDGET.IO extension.

  2. Click here to download.

  3. Load your widget in one click.

Widget Tutorial

Step Two:

  1. Click on Create New Overlay or select an existing one to modify.

  2. Adding a Widget in StreamElements

Step Three:

  1. Set the resolution (preferably 1080p), then click Start.

Widget Tutorial

Step Four:

  1. Upload your Downloaded widget ZIP file and click ‘Create Widget’.

  2. If your widget is not displaying completely, expand the widget canvas by dragging it backward.

Step Five:

  1. You need a Spotify account, then go to

  2. widget.greatvtubers.com

     and connect your Spotify to Get User API KEY.

Step Six:

  1. After successfully connecting your Spotify, copy the User API Key or press the Copy Key.

Step Seven:

  1. Paste your User API key in the API section.

Step Eight:

  1. Your widget has loaded successfully and is ready to go!

Step NINE:

  1. After successfully loading, save it from the top right

  2. Give it any name you want.

  3. Then, copy the link.

  4. Open OBS and create a new scene or use an existing one.

Step Ten:

  1.  In OBS, go to the Sources section and click on the plus (+) icon.

Step Eleven:

  1. After clicking the plus (+) icon, find ‘Browser’ and click on it.

  2. Give it any name you want.

Step Twelve:

  1. After setting your name, update the values.

  2. Paste the link you copied from StreamElements.

  3. Change the width to 1920px.

  4. Change the height to 1080px

  5. .Click ‘OK’.

Step Thirteen:

  1. Now you’re ready to go live with your Twitch widgets. Happy streaming!!!!

Shopping Cart0

No products in the cart.